This article is available in French.
This article aims to set up a dual-stack IPv4/IPv6 Network on Ubuntu 22.04 on Oracle Cloud. This article will not go through the nitty gritty details about networking or services Oracle provides; Only setting up the IPv6 on an Oracle Cloud instance.
Before you get started
Before we start, We expect you to have basic knowledge of Linux systems, navigating through Oracle Cloud Infrastructure Dashboard and have an instance running. Please also ensure you know what you are doing and know how to undo changes, in case your instance is unreachable.
Prerequisites
- Oracle Cloud Account
- Ubuntu 22.04 Instance
Selecting the Instance VCN
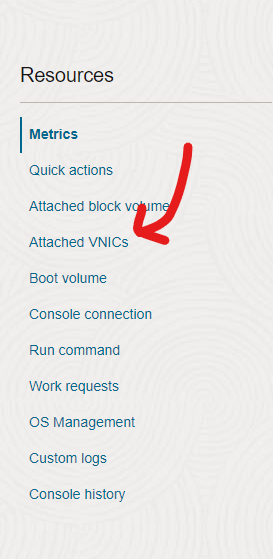
In case you do not know the instance subnet, you can go to the instance details and scroll down to the Resources section and select Attached VNICs.
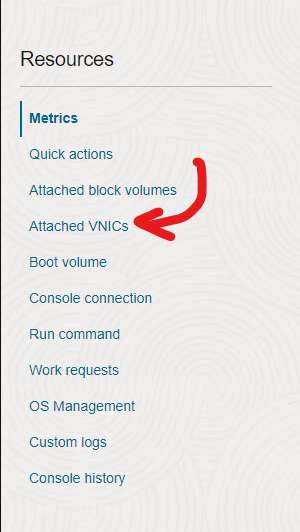
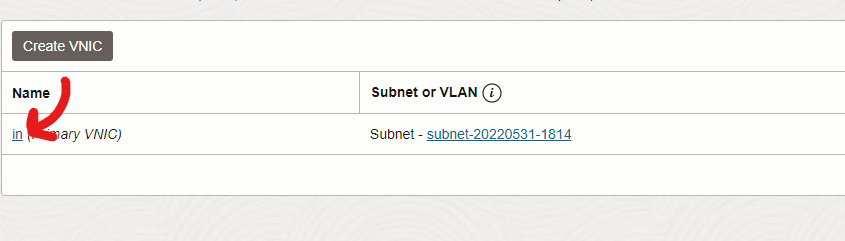
In there, click on the Subnet link that is attached to your instance.

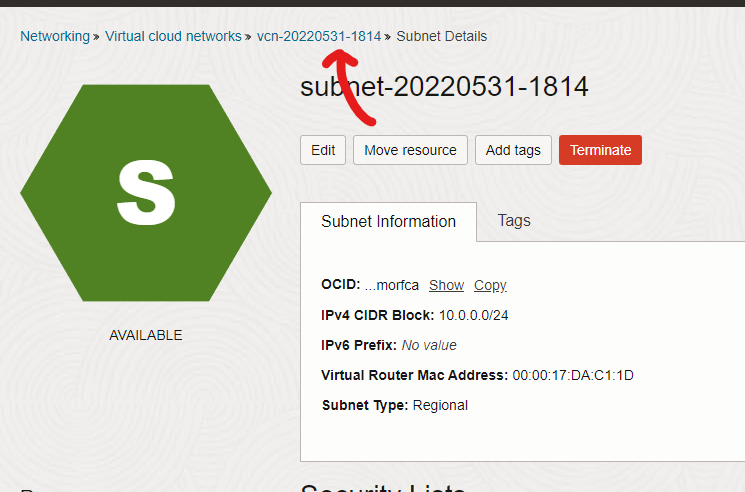
After you click, you should be on the page which shows your Subnet details.
Finally, click on the VCN name that is on the breadcrumb at the top of the screen.
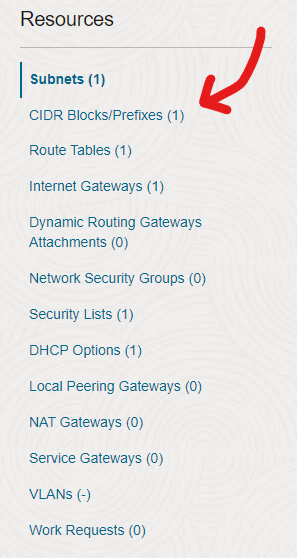
Now, finally, under the Resources section, select CIDR Blocks/Prefixes.
Adding IPv6 Prefix
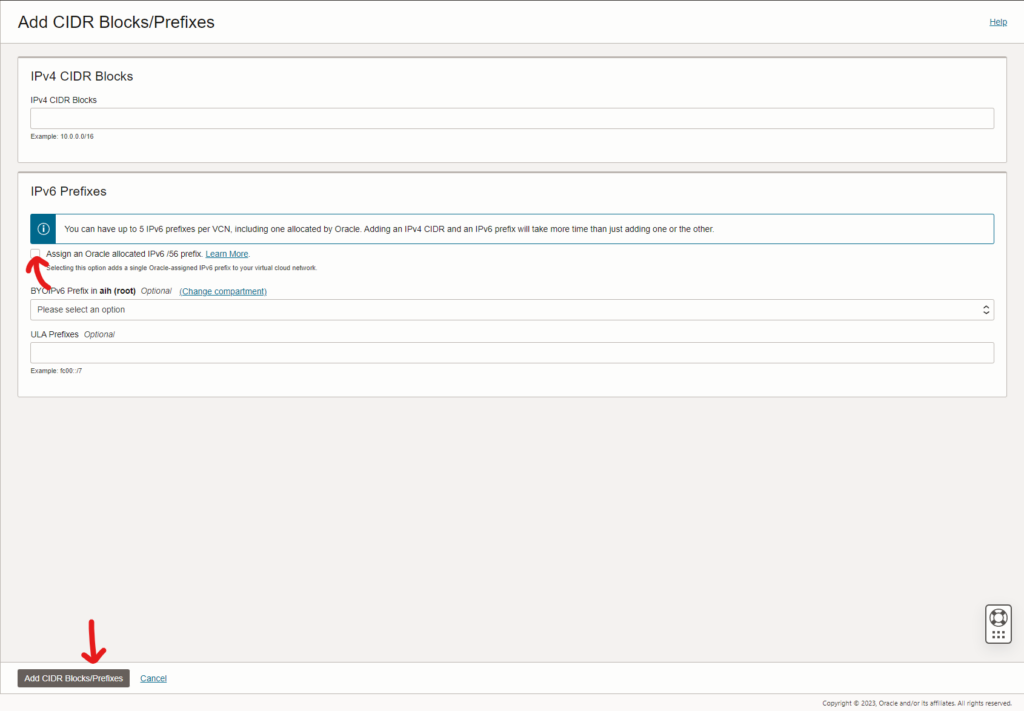
To add IPv6, click on the Add CIDR Block/IPv6 Prefix button.

Once you click on the button, a page should pop up asking for details. There, leave the IPv4 CIDR Blocks blank, check the Assign an Oracle allocated IPv6 /56 prefix box, and click on the Add CIDR Block/IPv6 Prefix button.
After you click on the add button, you may need to wait a few seconds before the IPv6 Prefix appears on the table. It will look like this after it has appeared.

Adding Routing Tables
After adding the IPv6 prefix, you have to modify the route table to be able to access anything via IPv6.
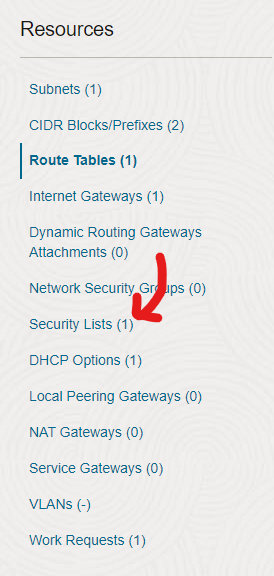
The Route tables option is available under the Resources section of the VCN, right below CIDR Blocks/Prefixes.

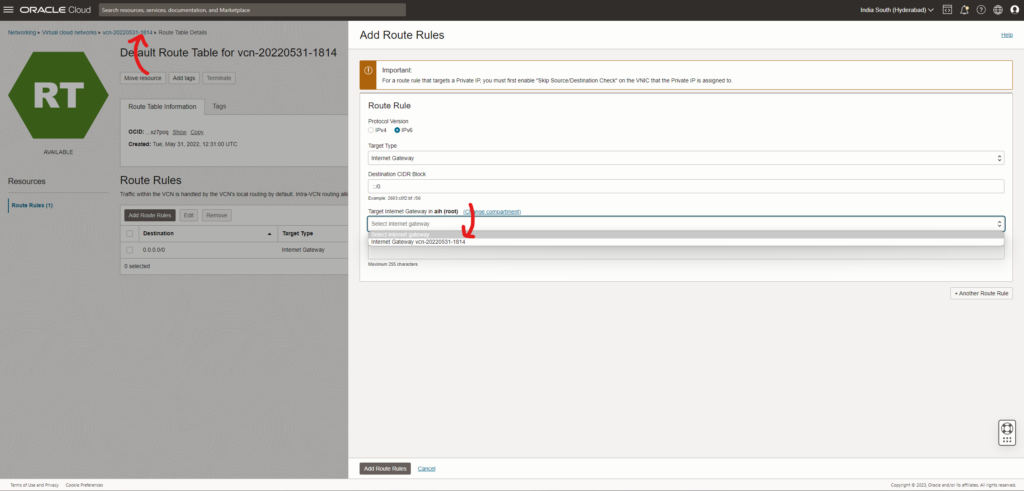
In the Route tables table, select the default route table.

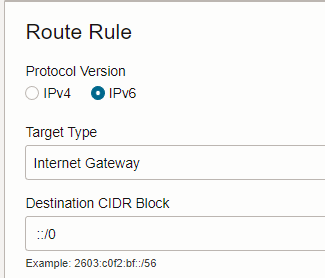
Click on Add Route Rules button and select the IPv6 checkbox radio. Under Target Type Dropdown, select Internet Gateway and add ::/0 as a value in destination CIDR.
In the Target Internet Gateway dropdown, you will have to select the VCN you are currently on. If you have multiple gateways, you can look at the breadcrumb visible on the background, as illustrated in the screenshot below.
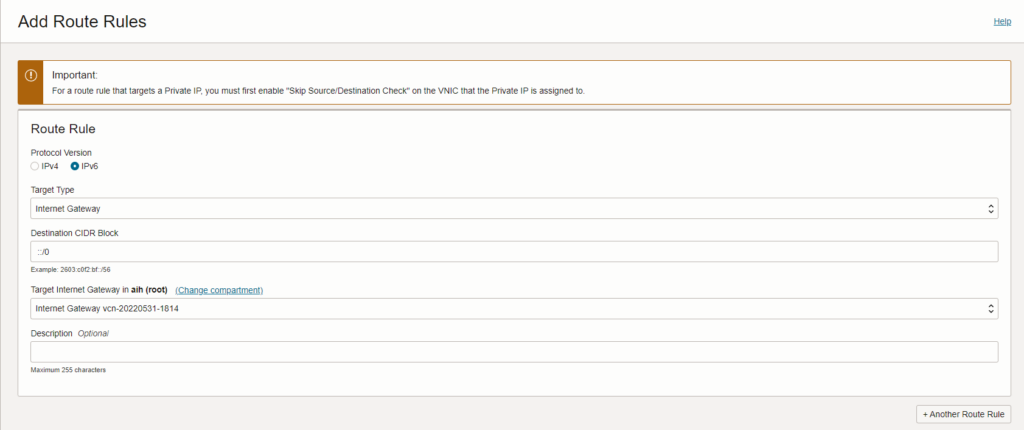
Finally, your rules should look like in the screenshot below.
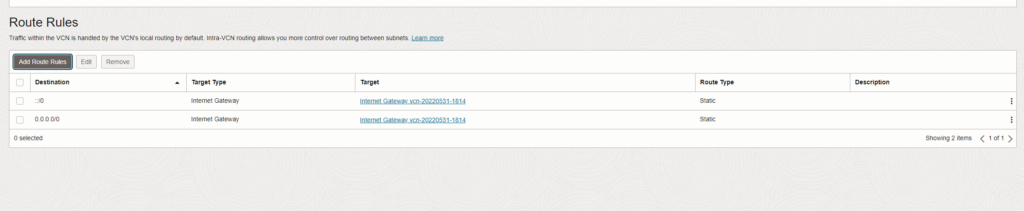
Hit the Add route rules button. Once done, the table should look like this.
Creating IPv6 security lists
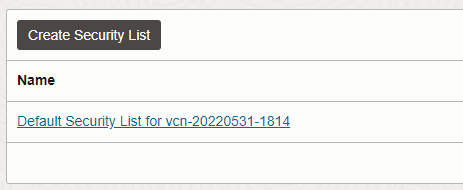
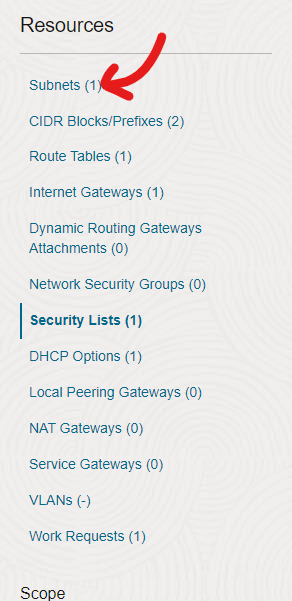
This step might be optional depending on your use case, but best to setup if you need to receive IPv6 traffic. To create a security list, go back one page and under Resources, click on Security Lists.
Click on the default security list.
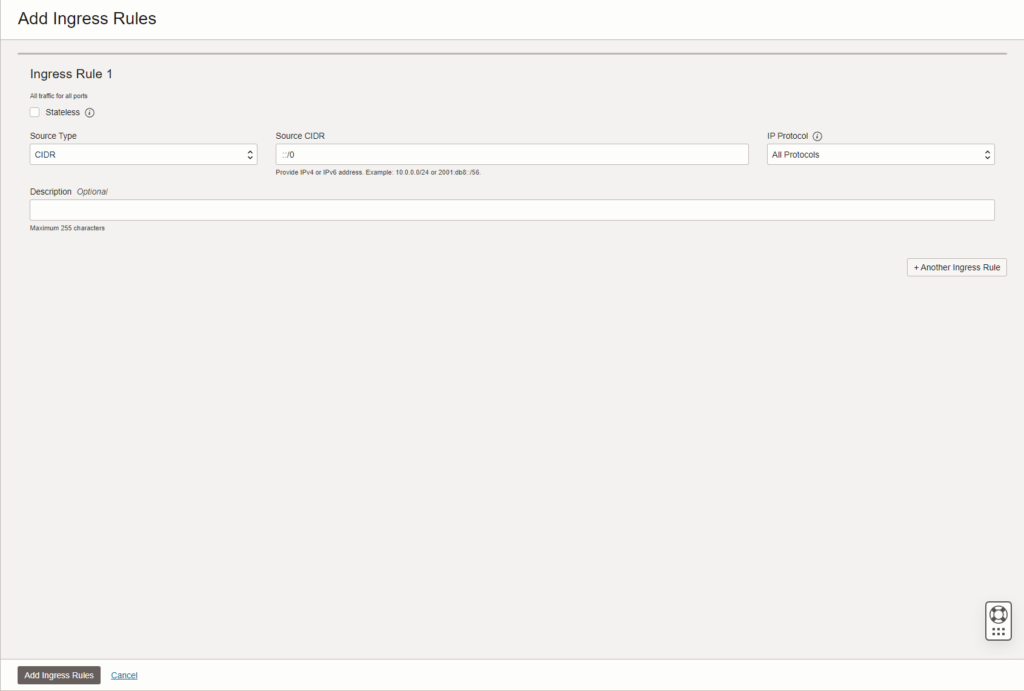
Depending on your configuration, you should add individual rules for each port.
Note: Do not use the All protocols option as in this example. Doing so will expose all your ports to the internet for some script kiddie to port scan and try to exploit any vulnerability in the software you use.
Click on the Add Ingress Rules button and select the appropriate options for your service and finally, click on the Add Ingress Rules button at the bottom.
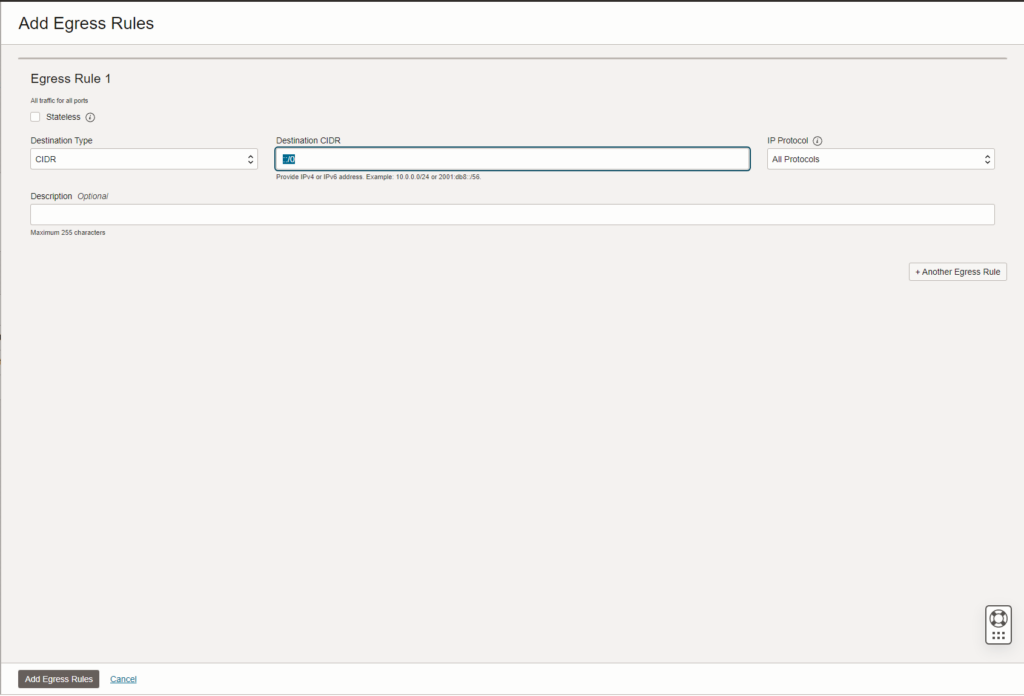
Once done, do the same for the Egress rule. If you want to connect to any v6 Address on the internet, you will have to add ::/0 to the Destination CIDR as in the example below. Once done, click on the Add Egress Rule at the bottom.
Adding the Address to the Subnet
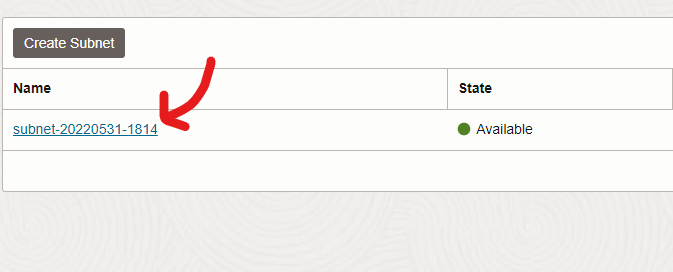
To add IPv6, go back to the page with the VCN Details and click on Subnets.
Click on the default subnet you have for the VNIC.
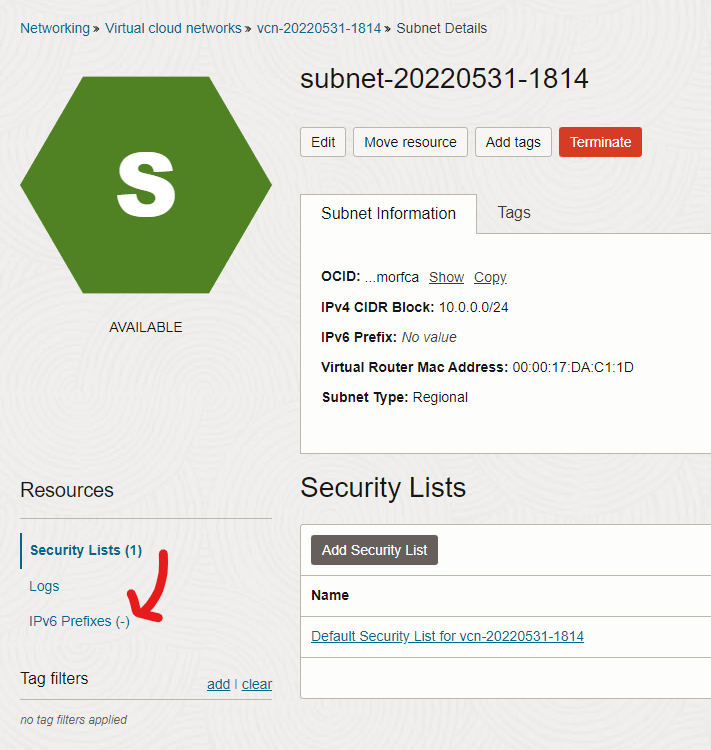
In the subnet, under Resources, click on the IPv6 Prefixes option.
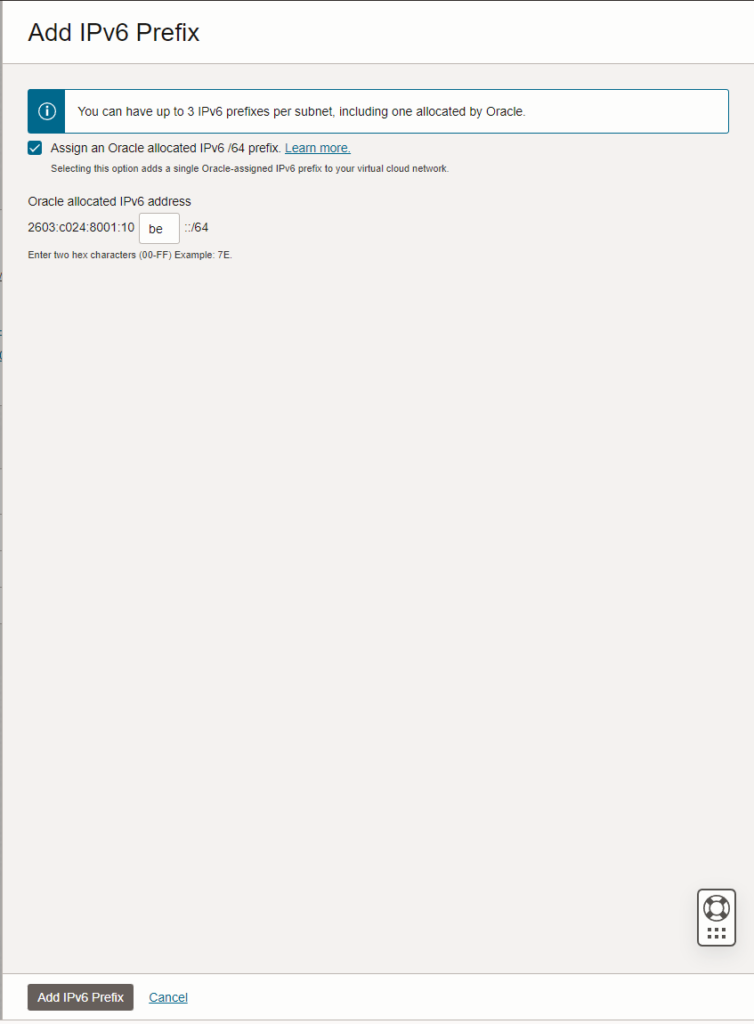
Then, click on Add IPv6 Prefix button. On the popup panel, click on the Assign an Oracle allocated IPv6 /64 prefix checkbox.
Once u select the checkbox, the option to add two hex characters should appear. You may add any letter you want (any from A to F). Once done, click on the Add IPv6 Prefix button at the bottom.
It may take a few seconds to load, after it has been added, the table should look like this.

Adding an IPv6 address to the Instance
Now, you are almost done. To add an IPv6 Address to the instance, select the instance for which you went through all this hard work, and under Resources, click on Attached VNICs.
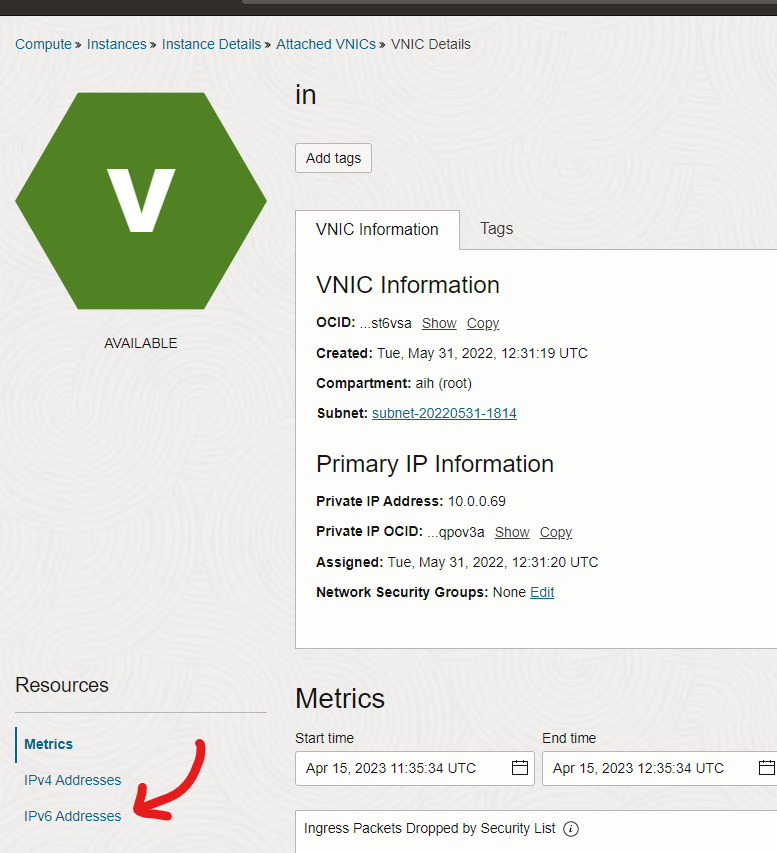
On the page, click on the name of your VNIC.
On the next page, click on the IPv6 Addresses option under Resources.
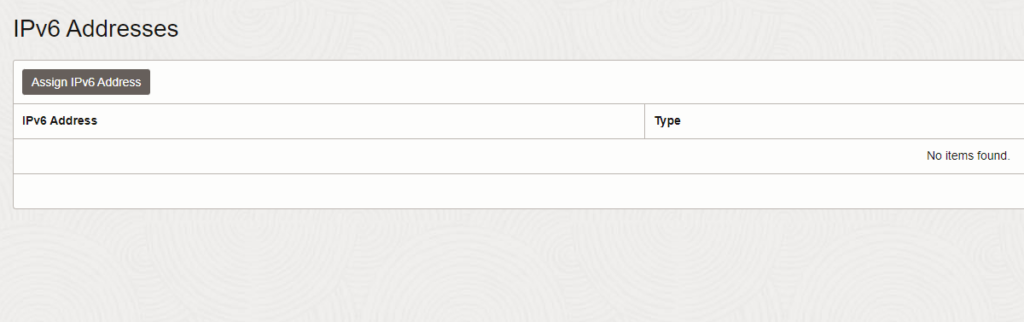
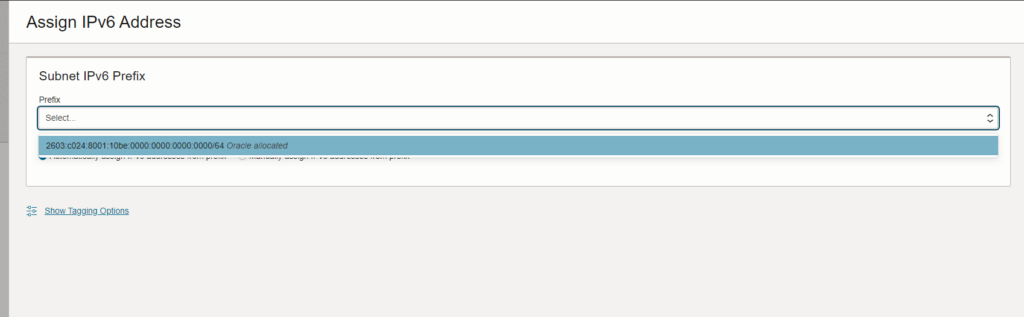
And finally, click on the Assign IPv6 Address button.
Under prefix, select the Oracle allocated address and click on the Assign button at the bottom of the page.
or, you can create your own IPv6 Prefix. Select the Oracle-allocated prefix and click on Manually assign IPv6 addresses from prefix checkbox.
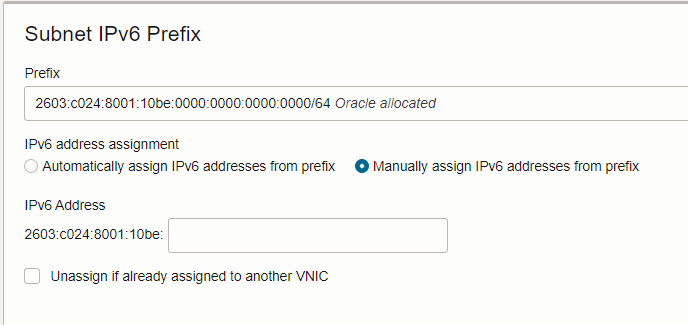
In the input box, you can add up to 16 hexadecimal characters (separated by a colon) and come up with your own creative IPv6 Addresses like the one shown in the example ;). (If you don’t have additional characters to put, you will have to add two colons at the end. I have attached Additional references to create interesting Hex words at the end of the page.)
Once done, click on the Assign button at the bottom and the IP should be assigned to your instance.

Testing IPv6 Connectivity
To test the IPv6 connectivity, first, SSH into your instance.
If you have MOTD enabled, it should come up on it like in the example below.
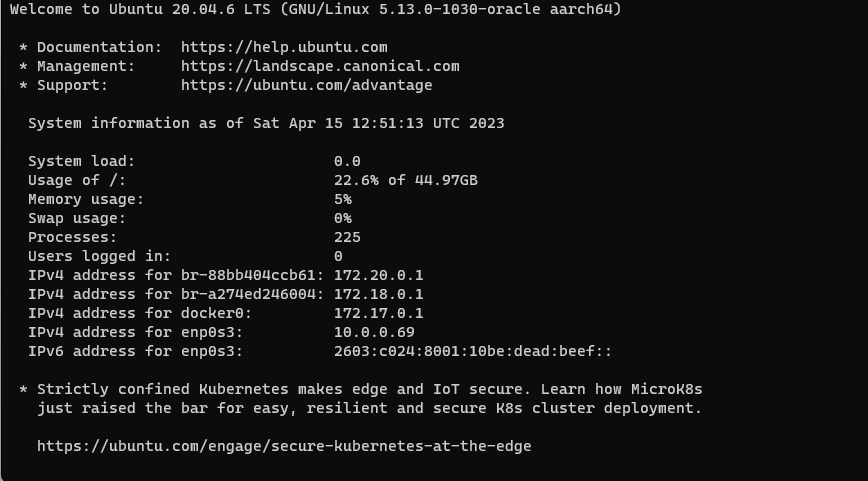
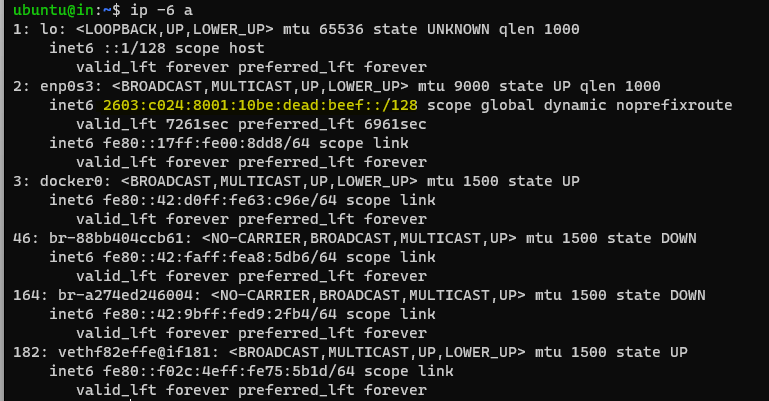
If you do not have it enabled, you can run the ip -6 a command to list all the IPv6 Addresses on your instance. It should be listed under enp0s3.
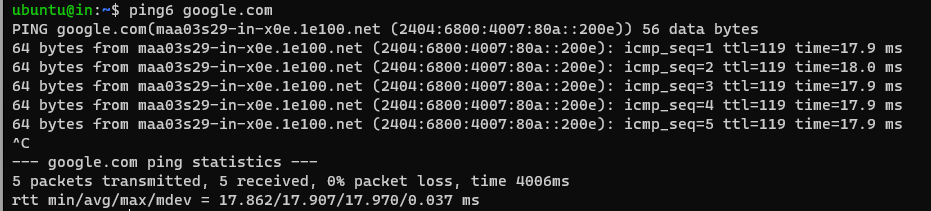
You can also use ping6 to test if you can connect to the IPv6 Addresses on the internet.
Or, You may use cURL to test the connection, run the following command to test the connectivity.
curl -6 https://ifconfig.co/ip
If you got the output on the tests above, congratulations 🥳🎉.
You have successfully set up IPv6 on your instance. If you didn’t get the expected results please comment below 👇
Additional References
Oracle Networking Documentation