This article aims to set up Hurricane Electric‘s free IPv6 tunneling on Ubuntu 22.04 with netplan using their Tunnel Broker service.
You might want to use this service if you want to get content from a different region, or just want to access IPv6 domains in general.
Before you get started
Before you start, we expect you to have basic knowledge of Linux networking and know-how to recover from an error (If any occurs). The steps written here may also become outdated with time though we try to update them as frequently as possible.
Please also ensure that you have ICMP unblocked in your network, as it will not work if Hurricane Electric cannot reach your network. To check your network ICMP status, you may use Vultr Looking Glass & put your IP address in the input field, and use the ping option to test. If your results return as a 100% loss, your ISP is probably blocking the ICMP connections or your router, in which case you will have to contact your ISP or unblock it in your router.
This article does not include bypassing your ISPs NAT or CGNAT. For that, you will have to use a VPN or contact them (probably the easiest). You may proceed further with the article if you understood the precautions.
Prerequisites
- An account on tunnelbroker.net
- Ubuntu 22.04 (Jammy)
- Netplan (it should come preinstalled)
Creating an IPv6 Tunnel
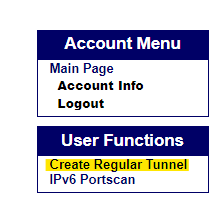
First of all, sign in to tunnelbroker.net and create a tunnel. To do this, click on “Create Regular Tunnel” on the left sidebar under the “User Functions” heading.
You should then be presented with a form. In the IPv4 endpoint, you will have to put in the IP Address of your network. After you put in the IP Address, the form should auto-update to confirm if your network can be used as a tunnel endpoint.
As to choices in the available tunnel servers, you may click on any location you wish.
Please note: It will lead websites using IPv6 connections to believe that you’re from the location you selected. In short, this may also work as a proxy (kinda?).
I selected the tunnel server in Ashburn, Virginia.
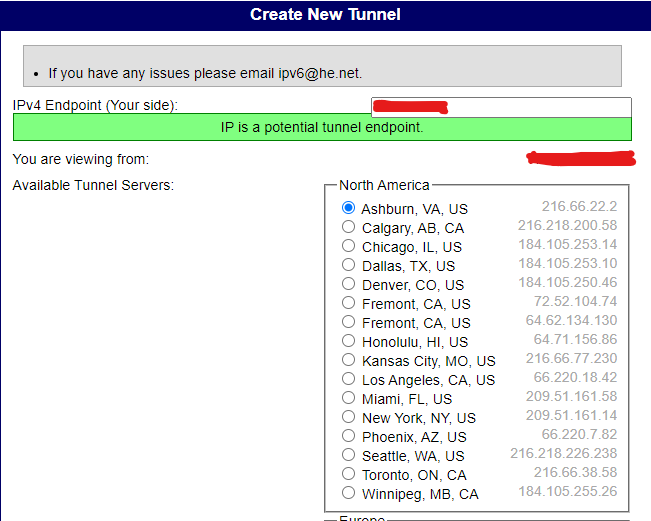
After you made the choices, click on the “Create Tunnel” button at the bottom of the screen.
Generating Tunnel configuration
Generating configuration file
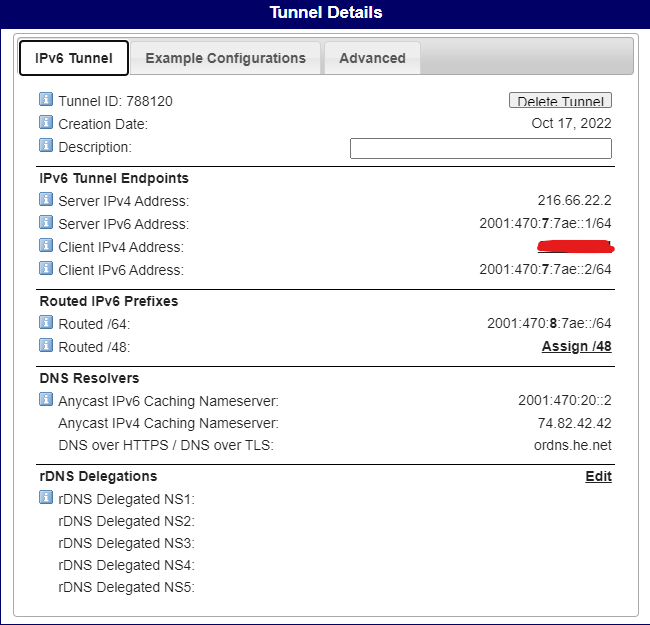
After a few secs of loading, you should be on the screen which shows the tunnel details, like on the one below.
You will now have to click on the “Example Configurations” tab, click on the dropdown, and select the “Netplan (Linux)” option.
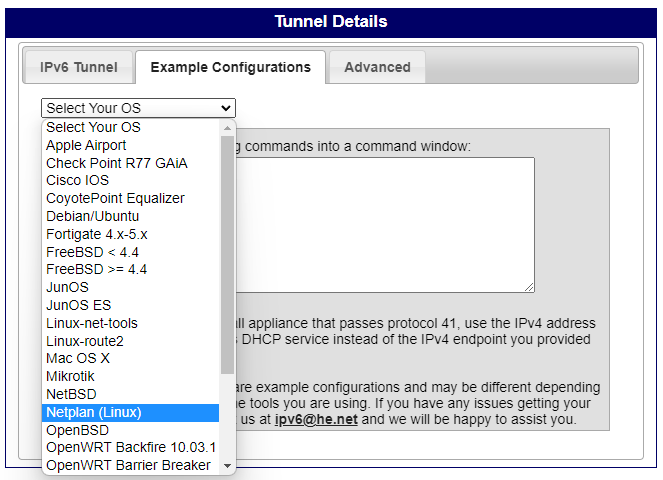
This will generate the configuration file for you. Select and copy the configuration.
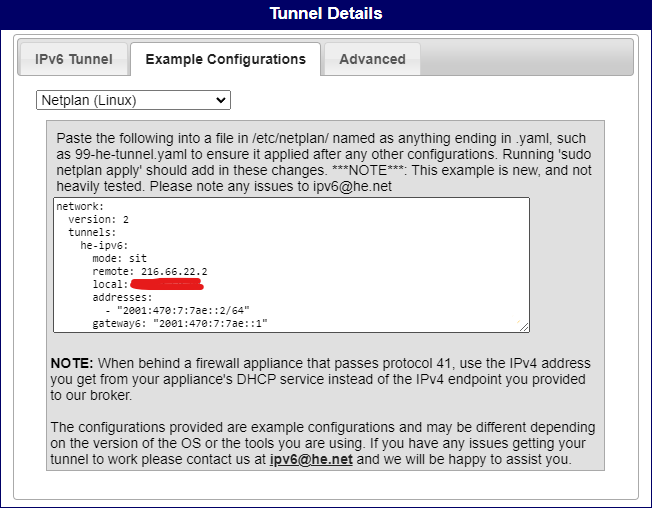
You may also replace values from the IPv6 Tunnel Tab with the code below where required. Oh, and do not forget to include quotes (“”) where the value states WITH_QUOTES and copy it to the clipboard.
network:
  version: 2
  tunnels:
    he-ipv6:
      mode: sit
      remote: SERVER_IPV4_ADDRESS
      local: CLIENT_IPV4_ADDRESS
      addresses:
        - CLIENT_IPV6_ADDRESS_WITH_QUOTES
      gateway6: SERVER_IPV6_ADRESS_WITH_QUOTES_AND_WITHOUT/64
Using configuration
Navigate to the netplan directory
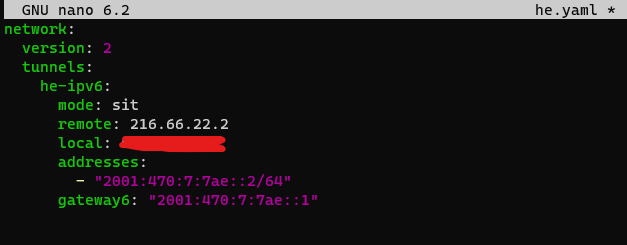
cd /etc/netplancreate YAML file
sudo nano he.yamlThis creates and opens up the he.yaml file in the nano editor.
paste the configuration
Paste the configuration you generated earlier, and Save and Exit the file by hitting CTRL + X.
Applying Configuration
Now, you will have to apply the netplan configuration by the following command.
sudo netplan apply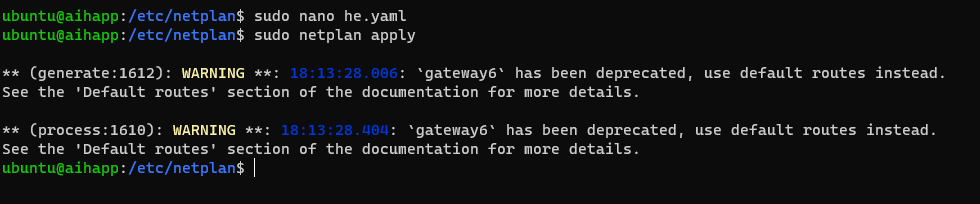
Reboot
It is recommended to reboot the computer after using the previous command as there may be some cases when it doesn’t apply.
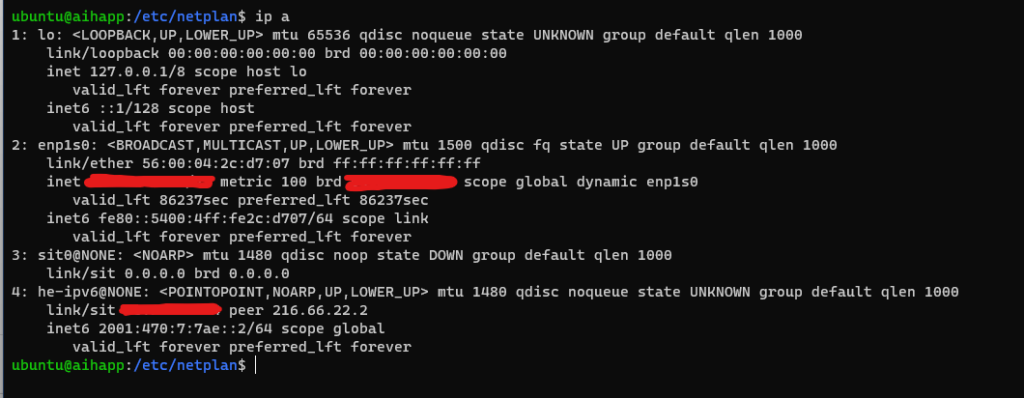
You may also double-check the connection by the following command.
ip aThis command should list all the interfaces you have, and at the end, there should be an interface named “he-ipv6“.
Testing the tunnel
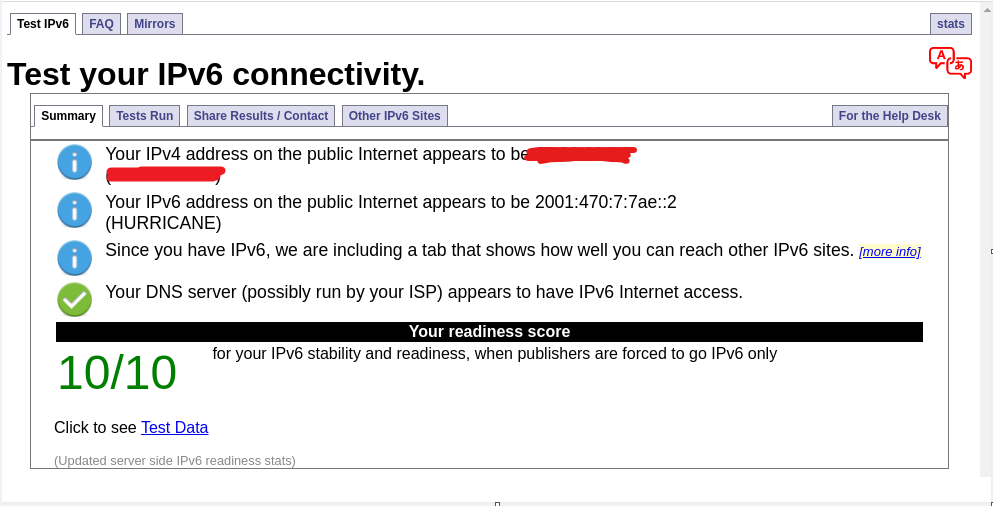
You may use any browser to test if IPv6 connections to websites are working. In my case, I used Chrome and went to test-ipv6.com to test my connection.
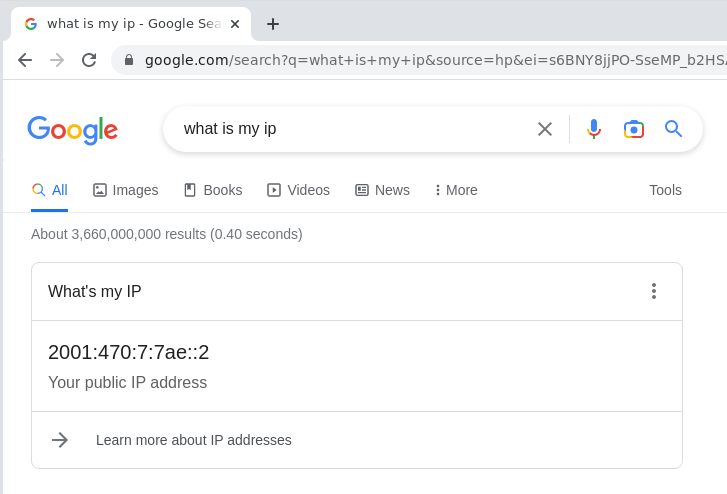
I also searched Google for my IP Address, which returned the IPv6 Address.
Removing IPv6 Tunnel
To remove the IPv6 tunnel and undo any changes, delete the YAML file and reboot the computer.
deleting the YAML file
sudo rm /etc/netplan/he.yamlrebooting
sudo reboot