This article aims to run Windows 10 on GitHub Codespaces. To achieve this, we will use QEMU for Virtualization, ngrok to forward our ports, and Real VNC as a VNC client.
Before you get started
Before we get started, make sure you know that doing this is likely against GitHub’s Terms and Conditions. So, make sure to try this out on a throwaway (new) account.
Please note that this demonstration is to show the capability of the Github codespaces.
Additionally, please do not have high hopes of running this as a daily driver because the performance is poor as we are virtualizing a system without KVM.
Prerequisites
- GitHub Account
- Ngrok Account
- Basic Linux Knowledge
- Real VNC Viewer (or any VNC Client)
After you have all the prerequisites fulfilled, we can now begin the installation process.
Creating a GitHub Repository
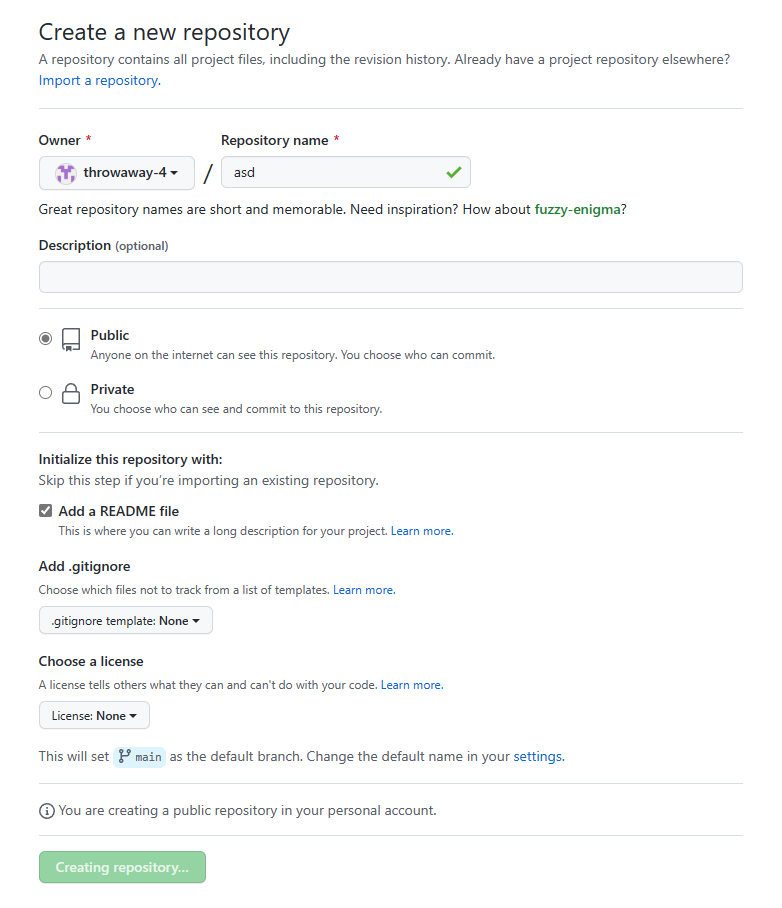
The first step is to sign in to your GitHub account and create a new repository. To create a new repository, you may click on this link.
On the page, fill in any random details and click on the “Create repository” button. Make sure the “Add a README file” checkmark is checked. You may also optionally make the repository Private.
Creating & Setting up codespace
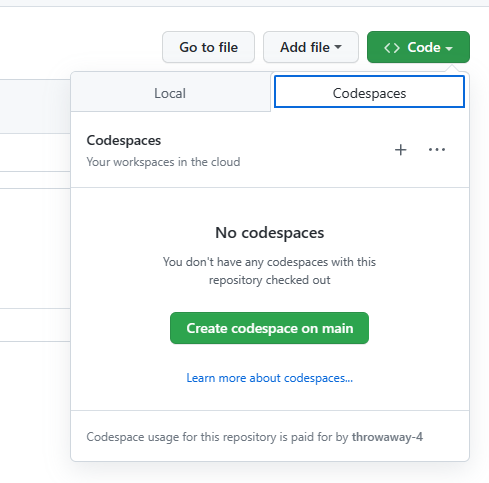
Once the repository is made, you will have to create a codespace. To do this, click on the Code dropdown, and click on the Codespaces tab. Once there, click on the green “Create codespace on main” button.
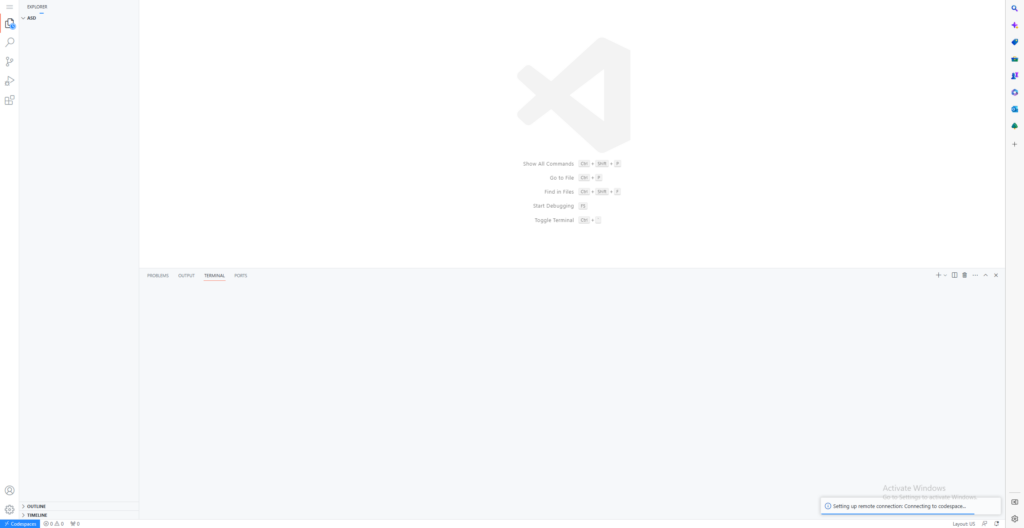
Once you click the create button, you will be redirected to a page with a code editor.
Setting container specs
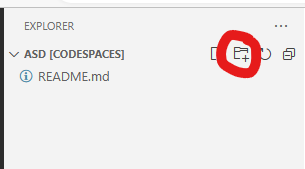
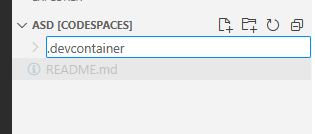
Once everything initializes, create a new folder called .devcontainer . To do this, hover on the top left section where it tells you your repository name [codespaces].
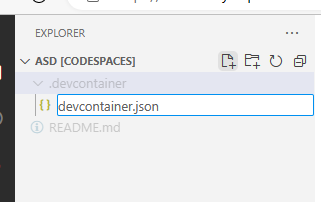
Inside the folder, create a file called devcontainer.json. This file defines the requirements for our “development environment”. You can learn more about this here.
In the file, paste the following code and save the file.
{
"image": "mcr.microsoft.com/vscode/devcontainers/base:ubuntu",
"hostRequirements": {
"cpus": 4,
"memory": "8gb",
"storage": "32gb"
}
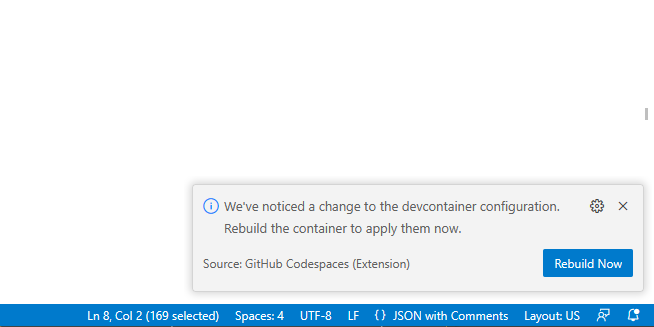
}Once, you save the file, a small popup should appear in the bottom right corner of your code editor asking you to rebuild the container. Click on the Rebuild Now button.
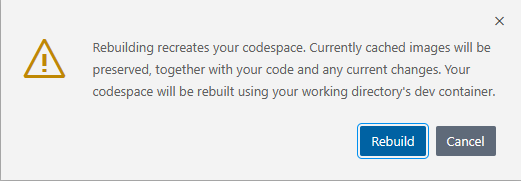
You will get a confirmation on whether you want to proceed with the action. Click on the Rebuild button.
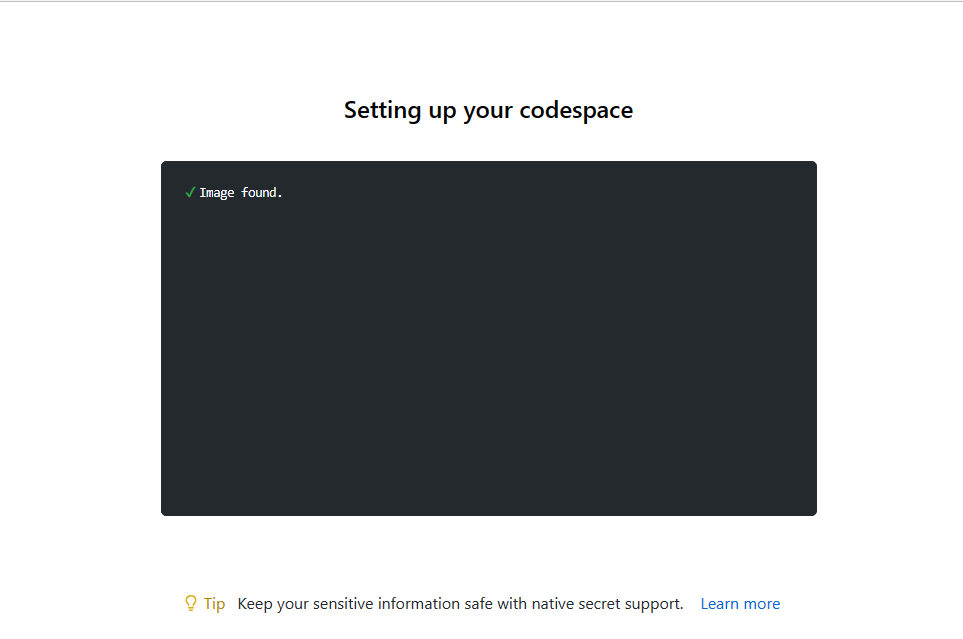
After you click on the button, you should be presented with a page that shows you the log of the recreation process. This should take no more than a few moments.
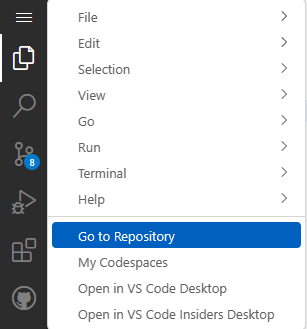
You will now have to click on the Hamburger Menu ![]() and click on the “Go to Repository” button.
and click on the “Go to Repository” button.
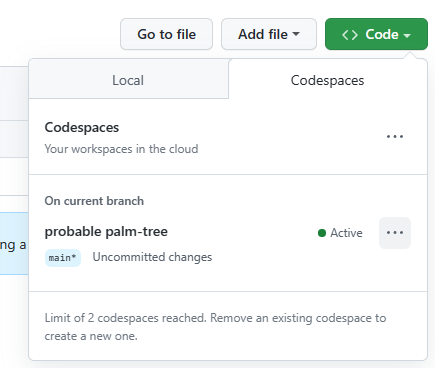
Once in the repository, click on the Code dropdown, there click on the 3-dot menu beside the codespace name.
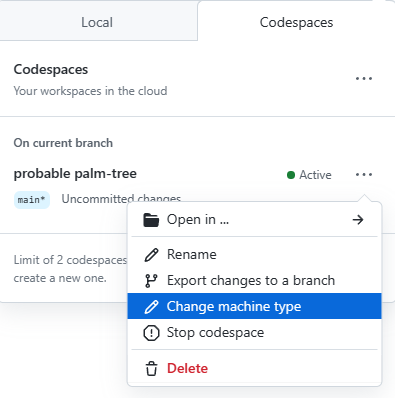
On the opened menu, click on the “Change machine type” option.
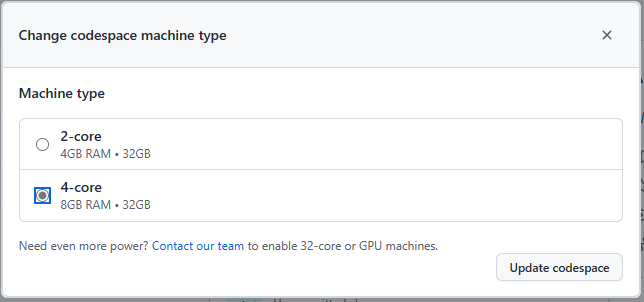
On there, select the 4-core option and click on Update codespace.
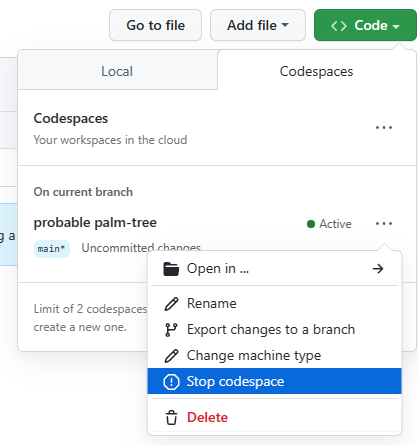
Again, click on the Code dropdown, click on the 3-dot menu, and click on the “Stop codespace” button.
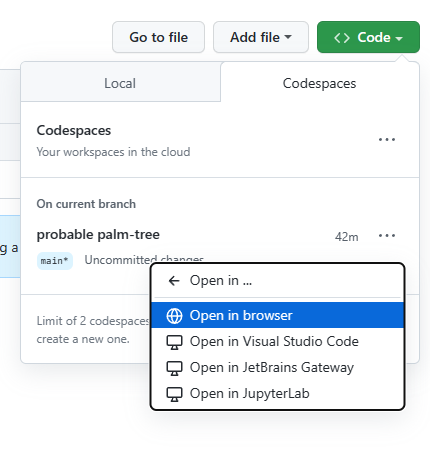
Re-start the codespace by clicking the Code Dropdown, clicking on the 3-dot menu, clicking the “Open in” option, and then clicking on the “Open in browser” option.
Once you load back on the editor, you are now ready to start installing the programs!
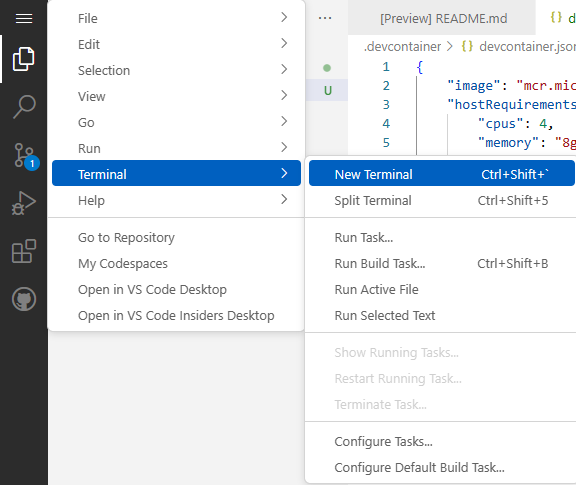
Now, if the terminal isn’t already open for you, click on CTRL + SHIFT + ` keys (Windows), or if you’re on Mac, ⌃ + ⇧ + ` to open a terminal or click on the Hamburger Menu ![]() and go to Terminal > New Terminal.
and go to Terminal > New Terminal.
Installing programs
First, go ahead and type in the following command to update and upgrade all the repositories.
sudo apt update && sudo apt upgrade -y
Now, we will install QEMU and libvirt-daemon. The following command should install the packages and the dependencies automatically.
sudo apt install -y qemu-kvm libvirt-daemon

Once the installation completes, we can now download the Windows 10 image.
Downloading Image
Please note that this is an unofficial minified Windows copy that has been modified in order to be as minimal as possible. I am also not sure about the modifications that have been made to the Windows Installation so, proceed with caution.
Additionally, I should also point out that I did try to install Windows from a fresh ISO with a bunch of different options on QEMU but, did not succeed as the OS BSODs before we reach the installation screen. So, if you manage to get it working, please comment down below.
We will be downloading the image from gofile.io a free file host. So, we need to run a terminal script in order to download the file directly.
Using downloader script
As of writing this article, I used this script to download from gofile.io. Please note that it may stop working in the future if their website is updated.
To use the script, first download and make it executable. To do this, execute the following commands.
curl https://gist.githubusercontent.com/shawnli87/d416b7c9030293cabfcf4c225cdc5a15/raw/2c85c8233abba10c94d5a2b70e7ea725011b7019/download_gofile.sh -o gofile.sh

chmod +x gofile.sh
Now, we can download the file from gofile.io. I have uploaded the image on the following link https://gofile.io/d/jJ4xfh. To download the image, execute the following command.
Note: if the file is deleted, please view the comments and use the Mega.nz download.
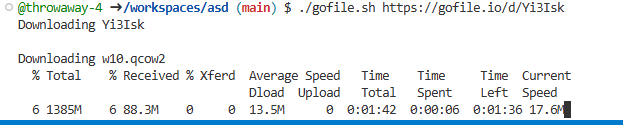
./gofile.sh https://gofile.io/d/jJ4xfhIt should show the following output whilst it’s downloading the file.
Starting Up
After it completes downloading, we can finally start the image! To do this, execute the following command.
qemu-system-x86_64 -m 4G -cpu max -smp 4 -usbdevice tablet -drive file=w10.qcow2 -display vnc=:1 -vga vmware &There is a lot to digest in this command, I briefly explained the flags in the table below:
| -m 4G | The amount of memory the Virtual Machine can use, in this case, 4GB. |
| -cpu max | The type of CPU to use, max in this case enables all features supported by the accelerator in the current host. |
| -smp 4 | The number of cores to provide to the VM. |
| -usbdevice tablet | We are passing a pointing device because, without this, the cursor is always offset by random values in the VNC connection. |
| -drive file=w10.qcow2 | The Windows 10 image to use as HDD and to boot from. |
| -display vnc=:1 | The type of display to use; In this case, we are using VNC on port 5901 |
| -vga vmware | The type of VGA card to emulate. |
| & | This character sends the command executed to the background in bash. We do it to execute additional commands. |
You can learn more about the QEMU flags here and special characters in bash here.
Port Forwarding the VNC Port
Now, we will have to forward our VNC port to be able to connect to the VM. We will use ngrok for this. It is also possible to do this if we install VScode but for the sake of simplicity, we are using the former method.
Download the ngrok binary first, using the following command.
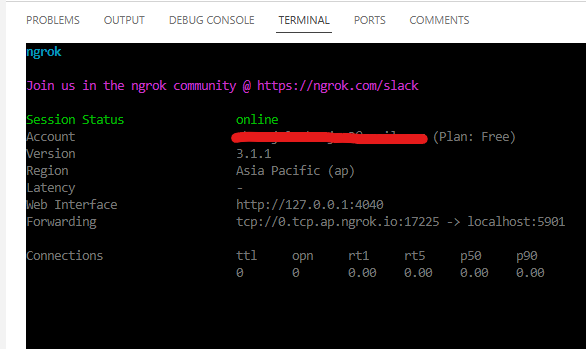
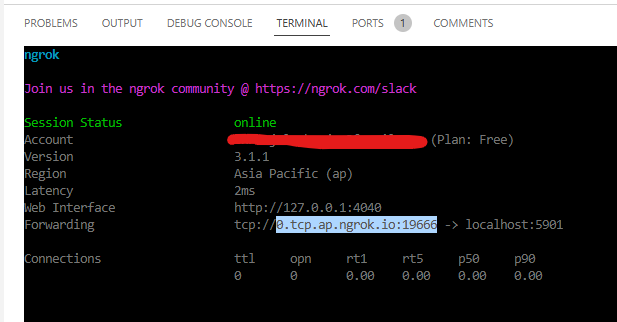
curl https://bin.equinox.io/c/bNyj1mQVY4c/ngrok-v3-stable-linux-amd64.tgz | tar -xzMake sure you’ve signed up for ngrok. Then, execute the following command to forward the VNC port (5901). Don’t forget to replace <token> with your ngork token (without <>). You can get the token here.
./ngrok --authtoken <token> tcp 5901You will get a similar output as in the screenshot below.
Connecting to the VNC Server
For this article, I am using Real VNC Viewer but, you can use any VNC Client.
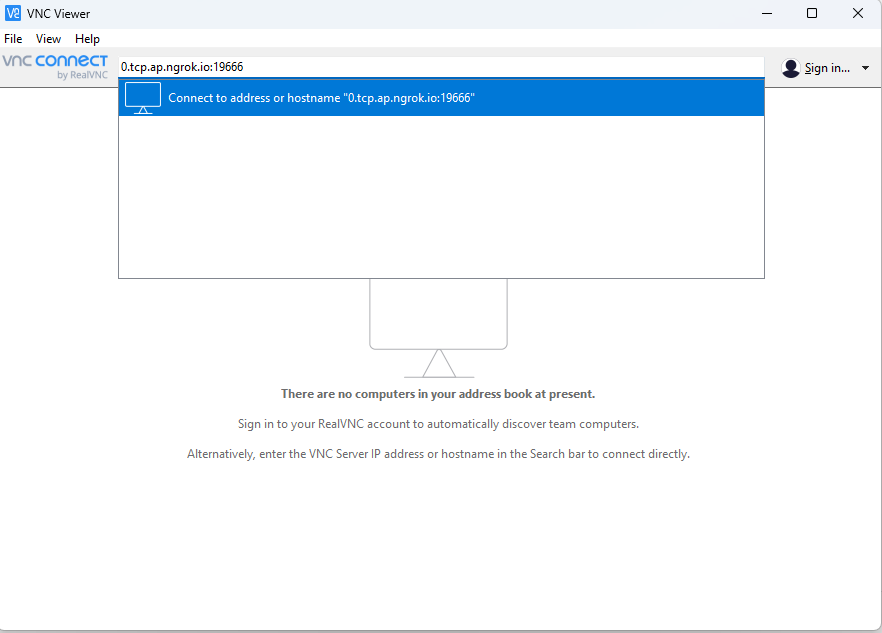
To connect to the VNC Server, copy the address after tcp://. It is different with each connection so, make sure you’ve copied the right address.
Open up the VNC client and paste in the address you copied and hit enter.
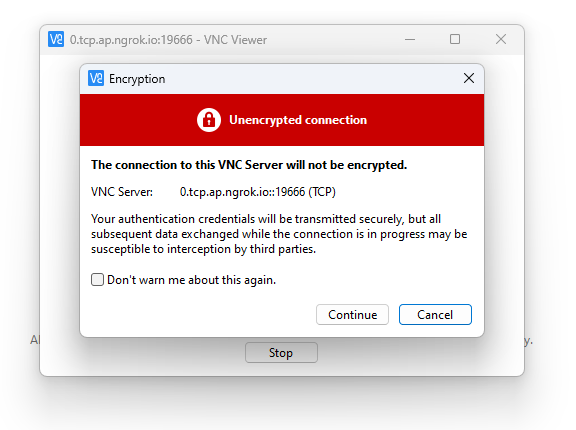
You will get a warning stating that the connection is unencrypted, you can ignore it and click on continue.
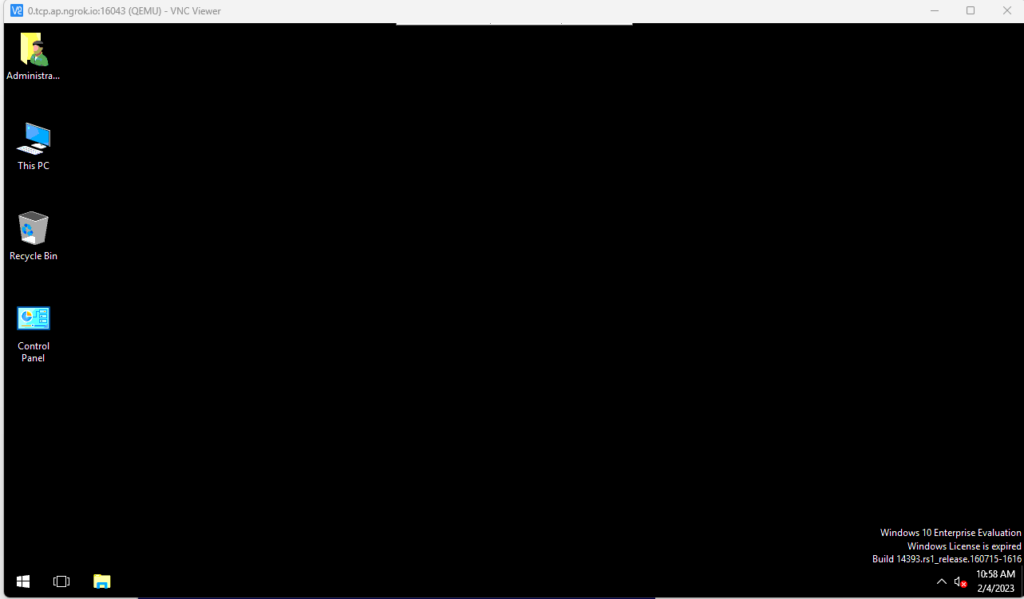
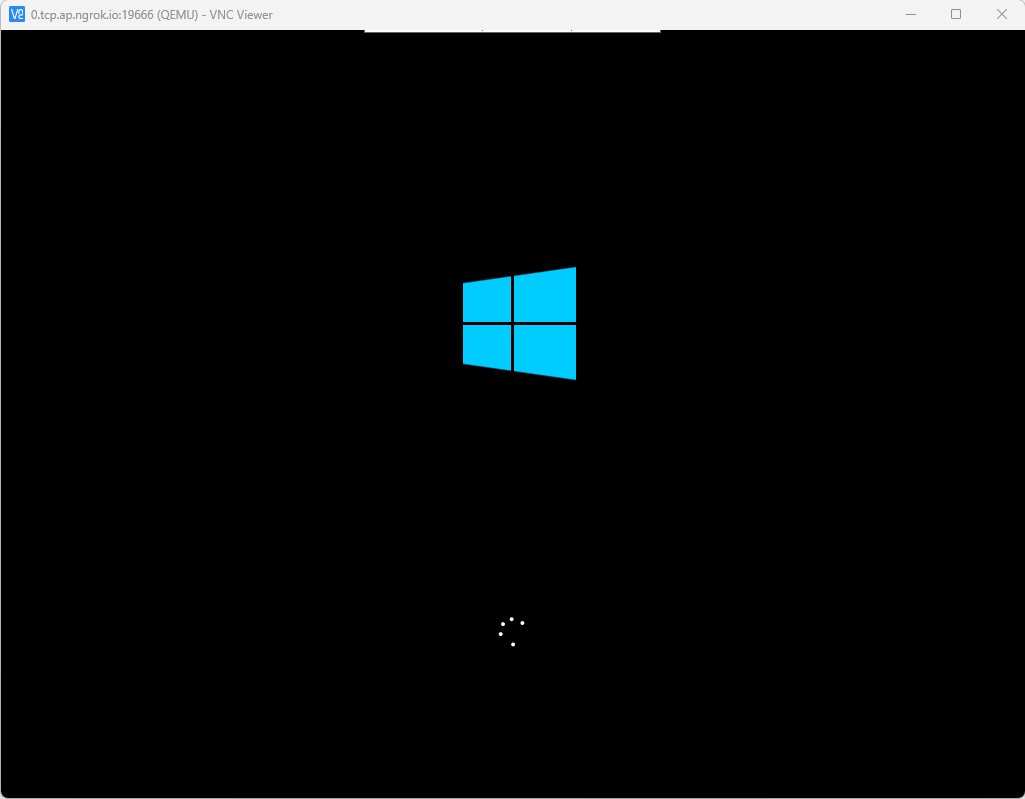
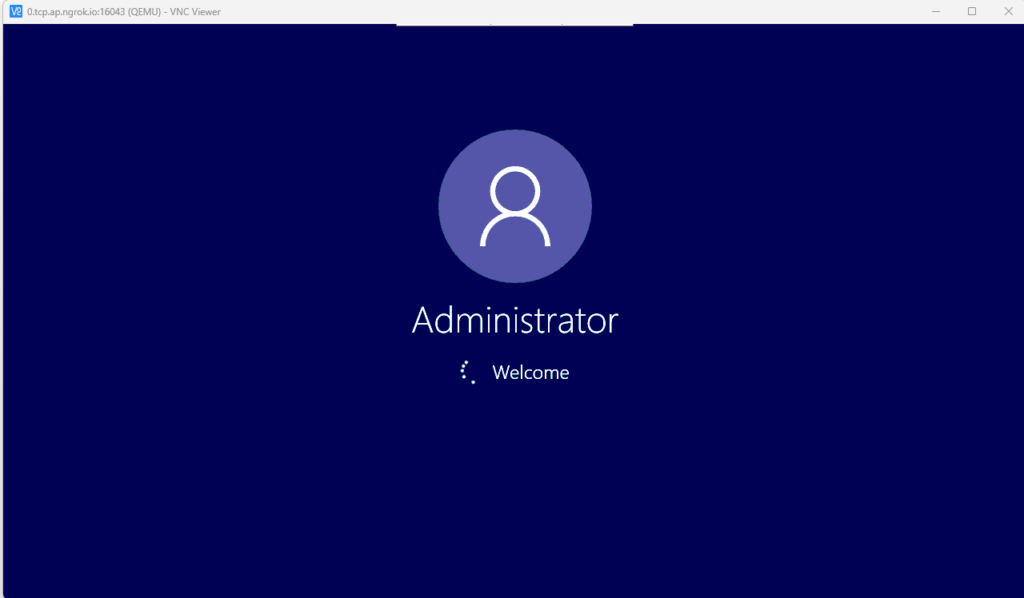
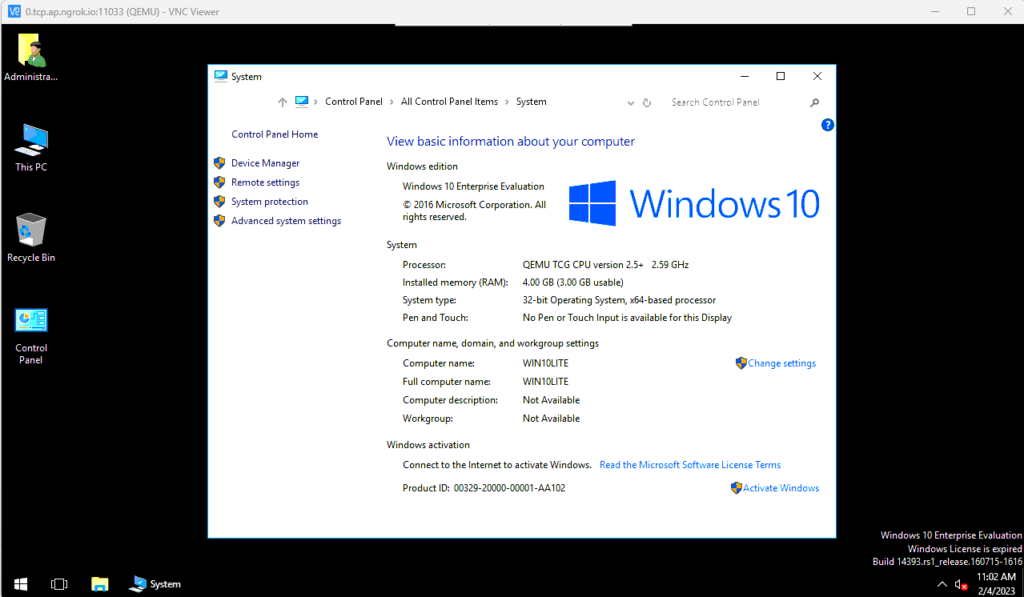
Once you hit continue, you can see Windows 10 starting up.
You will then shortly boot into the desktop, then ..? There’s nothing much to do, unfortunately x)
I’ll post an update, if I find anything interesting to do, like connecting to the internet.
Until then, if you want to access the internet through a VNC, you may view similar articles regarding this.
- Running VNC Server on Google Cloud Shell with ngrok
- Using Chrome in Google Cloud Shell with VNC Server
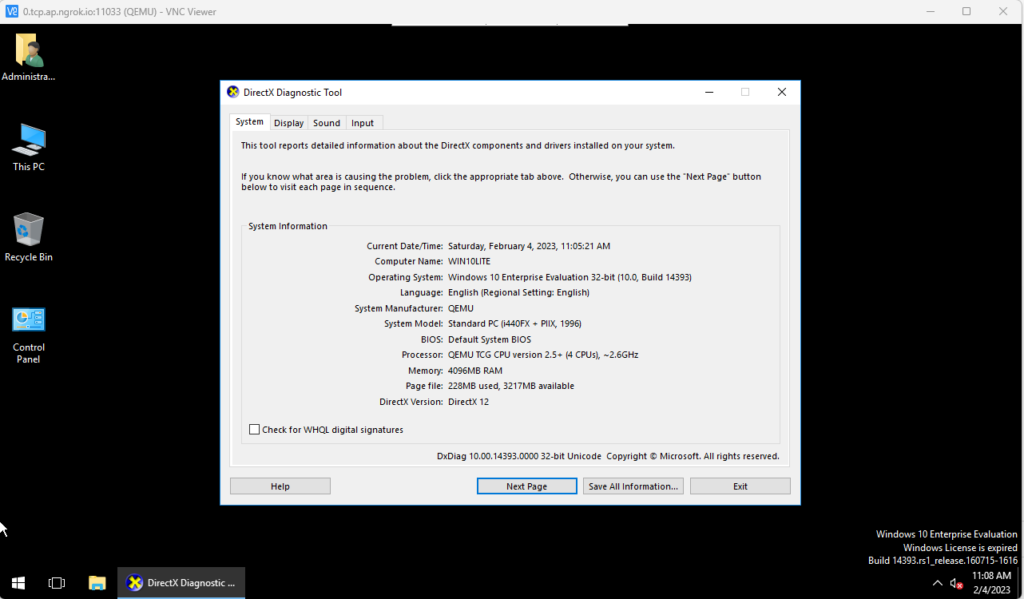
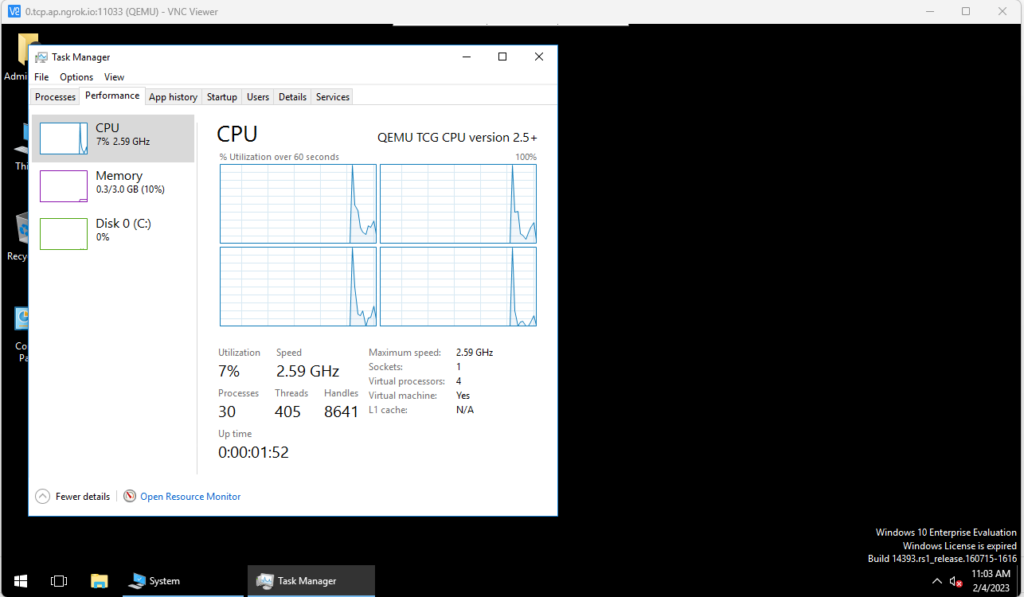
Some screenshots